Why breed insects?
There are a host of reasons for keeping insects. These motivations range from simple curiosity to mass production for commercial purposes. Whether individually, with the family, at school or in the laboratory, insect breeding has many reasons for being:
- Learn more about the biology of an insect.
- Obtain complete larval stages and life cycles.
- Learn more about the diet, locomotion, reproduction and life cycle of a particular species.
- Make a group of children responsible for the tasks generated by breeding (care, feeding, cleaning, etc.).
- Dynamically approach various elements of a school program (characteristics of living things, vital cycles, etc.).
- Obtain specimens perfect for scientific collections without collecting insects from the wild.
- Be self-sufficient as an institution for presentation to the public without having to harvest in-kind.
- Raising masses for tastings of insects.
- Reduce apprehensions or phobias by promoting the handling of insects.
- Set up fun activities such as drawing, photography and insect observation.
- Produce insects for biological pest control.
Raising insects to feed humans
Another great reason for keeping insects is to produce quality food protein at a low price. If it often arouses disgust among us, the consumption of insects is common in several countries, especially in Asia and Africa. Grasshoppers, locusts, ants and caterpillars have been part of the human menu for a long time, and scientists today find many benefits in these foods.
Pound for pound, the nutritional qualities of edible insects equal or exceed those of meat. In addition, the breeding of these small animals is more ecological and less expensive than that of the cattle.
Various forms of commercial breeding on a more or less large scale are being set up all over the planet, often at little cost. This helps to improve the availability of nutritious food in areas of malnutrition, while boosting the local economy.
Easy breeding suggestions
It is possible to carry out breeding with little equipment. Usually, all you need is a vivarium, proper food, and the necessary equipment to maintain adequate temperature, light, and humidity.
Some insects lend themselves better to rearing at home or at school than others. They can be purchased in pet stores, captured in the wild, or even take part in special activities offered by scientific institutions.
Here are some suggestions that will allow you to observe the development of insects belonging to different orders:
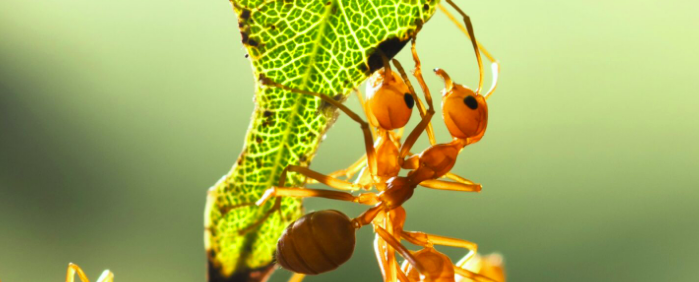
- The ants
- The house cricket
- Mealworm
- Praying mantis
- The monarch
Build an anthill
Prepare the material
What is needed for the harvest
- A plow to collect soil.
- A container to put the earth.
- A spoon to collect the ants.
- A container for transporting ants.
What you need to prepare the anthill
- A jar of at least one liter with a lid fitted with a metal washer, the washer of which you will replace with a piece of nylon stocking.
- A piece of wood that fits easily into the jar.
- A sheet of black cardboard large enough to surround the anthill.
- Sticky paper.
- Ant food (a piece of bread for example).
- A small piece of sponge that will serve as a water reservoir to water the ants.
Harvest the ants
Species belonging to the genera Formica and Lasius lend themselves well to harvesting. Those of the genus Formica are 6 or 7 mm long and are black. They form mounds of earth in the countryside. Small ants of the genus Lasius are brown. They live under large stones or build mounds of sand, in the countryside and in cities.
To harvest the ants, remove the top of the mound with the planter or lift the stone. Use the spoon to collect the insects (about fifty adults, larvae and nymphs, if possible the queen), in the same nest.
Collect enough soil near the colony to fill the anthill three-quarters full. Note the place of harvest, because you will come back to release the ants.
Arrange the anthill
Place the ants in the refrigerator for 10 minutes to calm them down. Prepare the anthill by putting the piece of wood and soil in the jar. Secure the black card around the jar with the sticky paper. The cardboard should cover the entire part of the pot where the soil is. Pour the ants into the anthill. Add the piece of water-soaked sponge and the food. Quickly close the jar lid.
Maintenance and observation
Regularly add water and food. Examples of foods are: a small piece of banana or apple, a piece of bread, cookie or cake the size of a thumb, dandelion flowers, sugar cube, etc.
To observe the evolution of the anthill, just remove the black card. By scanning the walls over the days, you could see how the workers construct galleries, store or exchange food, tend larvae, and more. Replace the box as soon as your observations are finished. Be sure to put the insects back in their middle at the end of your project.
Raising house crickets
To start a house cricket farm, get a few pairs of breeding adults from a pet store. Make sure you have as many males as there are females. The latter are distinguished by the elongated egg-laying organ at the end of their abdomen.
The vivarium
Cleanliness is essential for successful breeding. Use a transparent, easy-to-clean, airtight and well-ventilated container. A recycled vivarium or aquarium with a cover fitted with a fine wire mesh is ideal. Do not exceed the standard of one cricket per 2.5 cm². A 90 liter vivarium (approximately 75 cm x 30 cm x 30 cm) can thus contain 300 to 500 crickets.
Crickets are sensitive to vibrations and lighting. Install the vivarium in a calm and stable place, where it will benefit from 12 to 14 hours of light per day. Avoid placing it in direct sunlight.
Heat, water and food
For optimal performance, keep the temperature of the vivarium constant around 30 ° C. Use a 40W bulb during the day and a hotplate at night. Take measurements regularly with a thermometer and adjust heat sources as needed.
Crickets should not run out of water. Place a shallow container filled with gravel or small logs in the vivarium and add water regularly.
Crickets need a variety of foods: grains (oatmeal, wheat germ) and pieces of fresh fruit and vegetables. Medication-free poultry feed can be added.
Crickets sometimes eat their peers. Water scarcity, food shortage, and too much population density are among the factors causing cannibalism.
Shelters and nesting boxes
Crickets hide for protection, moult and reproduce. Egg cartons are excellent shelters. Replace them when they are dirty.
The layout of the spawning sites requires plastic containers with a depth of about 5 cm. To facilitate access to these nests, make cardboard walkways (see attached diagram).
Fill the nests with fine sand or peat moss previously sterilized for a few minutes in the microwave. Place two or three nesting boxes at the bottom of the vivarium. Each female can lay a hundred eggs in a few days. Keep the contents of the nest always moist to prevent the eggs from drying out. After three days, remove the nests and place them in another vivarium, still at a temperature of around 30 ° C, for the incubation period.
After 10 to 13 days, tiny crickets appear. They will become adults in eight to ten weeks. The rearing conditions are the same for the young and for the adults, but the young must be isolated to prevent them from being eaten.
Adult crickets live two to three months. You can take them regularly, taking care to always keep about ten breeding pairs.
Raising mealworms
Equipment
The mealworm is an excellent candidate for domestic breeding. It is silent and easy to handle. About sixty larvae, easy to find in pet stores, are enough to start breeding.
You will also need:
• at least three plastic containers with lids. To ensure good ventilation, make an opening in the lid and cover it with mosquito net or muslin (breeding containers are also sold in pet stores);
• mixed grain products in the following proportions:
- 10 parts of oat or wheat seeds
- 10 parts oatmeal or whole wheat flour
- part of wheat germ or powdered milk
- a portion of nutritional yeast (important for preventing nutritional deficiencies in insects)
- pieces of vegetables (cabbage, carrot, potato, lettuce) or fruit (preferably apple), which will provide insects with the water necessary for their development
• if necessary, accessories for heating the vivarium (40 watt bulb or hot plate).
The vivarium and care
Place the vivarium in a dark, dry, well-ventilated place. In a first well cleaned container, place a layer about 2.5 cm thick of the cereal mixture. Then add the larvae and place a few pieces of fruit and vegetables directly on the mixture.
The mealworm larva reaches about 3 cm in length before developing into a nymph. As soon as the first nymphs appear in the breeding tank, transfer them to a second container to prevent them from being eaten by the larvae. As the nymphs do not feed, there is no need to add anything to the container.
When the adults emerge, they appear as small whitish beetles which then turn black. They too can eat the nymphs. You must therefore transfer them to the third container, where you will have placed 2.5 cm of the mixture of cereals and pieces of fruit and vegetables. Adult mealworms may begin to mate two to five days after emergence. Females lay up to 40 eggs per day. The eggs hatch after about 12 days. The larvae moult several times before reaching their maximum size. At temperatures ranging from 18 to 25 ° C, the mealworm in cultivation takes six to ten months to complete its life cycle.
Replace pieces of dried fruit or vegetables often. Also change the mixture when it takes on a sandy appearance. The insects must then be removed one by one or separated from the mixture using a sieve. Regularly remove dead insects and take the opportunity to stir the cereals to incorporate the molts of the larvae into the mixture, allowing them to be eaten by the insects. During each harvest, be sure to keep several larvae that you will allow to transform into adults, otherwise your breeding will be short-lived.
Raising praying mantises
It is easy to catch adult mantises because they move slowly and are harmless to humans. We can easily distinguish the males, smaller, from the large females swollen with eggs. The harvest of these females makes it possible to observe the manufacture of egg cells and the laying.
Care of the ready-to-lay female
Place a female in a good-sized container with a screened opening. Install in the container a branch placed vertically to serve as a support for the insect. Keep the temperature of the container between 20 and 25 ° C.
An adult mantis should be fed every three days. The insects offered (flies, mosquitoes, crickets, cockroaches, butterflies, etc.) will be alive and less than or equal in size to the mantis. Before spawning, the female eats a lot and needs to be fed more frequently. Provide it with water by spraying the inner wall of the container about once a week or by placing a lid filled with water at the bottom of the vivarium.
When ready to lay eggs, the mantis makes an ootheca (or more) on the branch or on the wall of the container. The insect dies a few weeks after the last laying.
Without having a captive female, you can harvest eggshells found in vegetation, in autumn and winter, on stems or branches. Be sure to place the ootheca in the correct direction to promote the emergence of young.
Child care
When the larvae appear, feed them abundantly to prevent them from devouring each other. At first, offer them small prey (aphids, fruit flies, nascent crickets). The young can be isolated in small containers after the second moult. For starters, empty jam or yogurt jars that are closed with a mosquito net will do the trick. A branch should be placed in each container to serve as a support during the moult. The distance between the upper end of the branch and the base of the container should be at least three times the length of the insect.
Adult care
Adults can mate two to three weeks after the last molt. Offer them as much food as they want for several days before bringing the partners together. If she is hungry, the female can eat the male before mating, which can last for hours. Provide the female with prey throughout this period. Remove the male as soon as the partners separate.
Regularly clean juvenile and adult breeding containers by removing dead insects and other debris with tongs. If necessary, transfer the insects to another container for cleaning. Praying mantises should be handled gently. You can move them while they are in their holder or let them mount on your hand. Avoid dropping them even if they suddenly try to bite you.