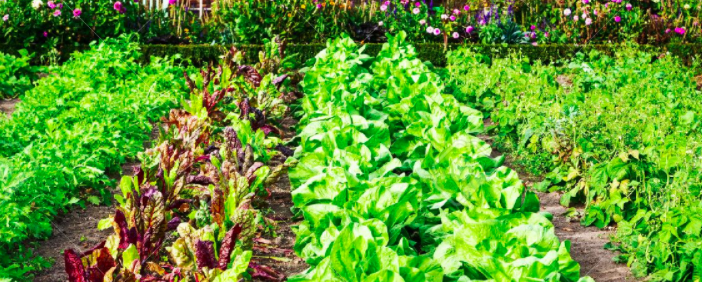
Grow your own vegetables
You plowed a gardening area, fertilized the soil with organic materials and removed all the pebbles. Now you are ready to sow. Check the orientation of the garden so that the rows are traced east-west as much as possible; you will position the tall seedlings on the northeast side. Think of sowing early vegetables: lettuce, peas, spinach and vegetables that need heat such as tomatoes, eggplant and pepper.
1. The seeds
Mark your ranks with a peg at each end and connect them with a gardener’s rope. Dig furrows with a depth of 1 cm for small seeds and 2 cm for large ones. Sow the seeds at equal distances from each other.
The large seeds can be spaced 3 cm each. If the soil tends to harden, cover small seeds with potting soil, compost or a mixture of soil and sand or fine peat moss. Compact the soil slightly and water it gently. Place on the stake an identification card on which you will write in indelible ink the name of the vegetable, the variety and the date of seeding.
Be sure to keep moist soil around the seeds until germination begins. Check the humidity level daily, and if the soil is too dry, water it slightly. Do not overwater, because too wet soil can rot seeds; the soil must be moist, not soggy.
2. The pruning
Pruning seems to be a tedious step, especially for novice gardeners. But without pruning, the radishes will not form a bulb, the carrots will look like a sewing thread and the apples of lettuce will have a puny appearance.
Start pruning when the young shoots have reached a height of 3 to 5 cm. Do not try to remove all shoots at the same time. Start with the row of lettuce by removing one shoot out of two. You will remove the others later, when the lettuce has grown enough to be picked. When pruning a row where the shoots are very tight, pull the plant carefully upwards, so as not to damage the roots of neighboring shoots.
3. Weeding
Weeds compete with your vegetables for water and nutrients and they will grow at a galloping pace in rich, well-grown soil. If you let the weeds grow freely, when you remove them later, you risk damaging the roots of the plants you want to keep.
Do a weekly or biweekly weeding schedule and work with a hoe. When the weed is small, you can simply scratch it. But if you push the hoe further than 1 or 2 cm into the ground, you risk cutting the root of the vegetables. Large weed plants and those growing between rows can be pulled out by hand. It will be easier to do if the soil is wet; try weeding after a rain or the day after the watering day.
4. Water
The plants need 3 to 4 cm of water a day. During hot and dry periods, or when the soil becomes friable and dry, you must water your garden. Watering is especially important for young shoots that have shallow roots. When the plants have grown further, the roots go deep into a wetter soil area even when the soil is dry on the surface. Deep watering is always more effective than short waterings on the surface.
The hose is a basic tool for the gardener. You can use a rotary or oscillatory to better manage watering. Adjust it to get the widest possible drops, to avoid evaporation. The oozing hose, a perforated hose, whose holes are oriented towards the ground is a good way of watering. The water soaks the soil in a fan shape and wets the roots. Plan the morning or early afternoon watering sessions so the leaves have time to dry before dark. Wet leaves are more prone to fungal infections.
5. Mulch
Mulch is used to cover the soil and is made of organic materials such as leaves, straw or grass debris. The use of mulch reduces weeding and keeps the soil moisture around the plants. Mulch can also prevent the onset of telluric diseases.
A quality mulch contains materials such as broken straw, which has already begun its decomposition cycle; cut grass debris that has begun to dry and gray; peat moss mixed with sawdust or wood chips. The peat moss alone will compact, dry and not allow water to enter.
When the shoots reach a height of 10 cm, spread a good thickness of mulch between the plants and between the rows. During the summer, add mulch as it disappears. If you keep a permanent layer of mulch in your garden, the soil will heat up and dry more slowly in the spring than uncoated soil. Set the mulch aside where you will sow scoops and wait for the soil to warm up and dry before proceeding.